The Figure Painting GUides on madaxeman.com
Guides on this site include:- 15mm Hoplites - This Page!
- 15mm Generic Arab Foot,
- 10mm WW2 Infantry,
- 15mm WW2 Germans,
- 15mm WW2 US Para's,
Painting By Numbers - Greek Hoplites
(Inspired to get more figures? This site now carries all of ebays 15mm, 25mm and 28mm ancients auction listings)
| 1 | I now as a rule base all infantry before painting them -
it took me a while to get round to the idea that it is possible to paint
them like this, rather than as individual figures. However it speeds up
the process so much, and using ink washes (as you will see later) and a
second layer of black undercoat where you have armor does a
great job of disguising any imperfections in the final finish. And in
any case, they are 15mm high figures, usually viewed en-mass from a
distance of at least 2 feet !!! These are a mixture of various Essex ranges, with Chariot Miniatures The undercoat is a standard car undercoat spray, from Halfords - cheap, big, and provides a very fine, even and adhesive coating - which is probably not surprising, as it is an undercoat for car paintwork. |

All images on this page are thumbnails - click on any of them to get the "bigger picture" ! |
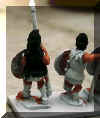
| 2 | After doing the undercoating, I moved onto the flesh - using the Miniature Paints flesh. No real need to be too careful about this, as virtually all the other bordering areas will be covered with another colour fairly soon anyway. Always check that you are doing the feet as well - there is possibly an argument for leaving them until later on in the process, so you can use a small brush for the arms and legs, and a bigger brush for sloshing on the feet. |  |
| 3 | This is the next stage - the "undercoat for the armor. This is just a matt black, applied to all the helmets, pretty much all the hair (at the back of the neck, and on beards - not just to wildly stereotype the Greeks, but also because hair isn't that visible at all on these figures, what with armor, helmets and the like - so having a variety of hair colors isn't actually adding that much to the overall effect. Bare-headed auxilia, now that'd be a different story...... |  |
| 4 | I only went for a relatively low percentage of these hoplites with metallic (black-coated at this stage) body armor, as I'd discovered an ink-based technique that gave me a pretty satisfactory version of the white starched-linen armor effect. I have seen it done far better with people clearly painting white detail over a black undercoat, but it was way too hard for me to contemplate - after all, this is about doing them quickly & adequately, not perfectly! |  |
| 5 | Then we go for the (still fairly messy) dry-brushing of the armor over the black undercoated regions. Normal dry-brushing drill, an almost- knackered brush, and a variety of bronze/brass/gold paints. I guess strictly they should all be the same, but the mat varnish I add tends to tone down the shine anyway, and the desired effect is variety, so a bit of difference in the "shine" on the row of near-identical helmets can only add to the effect IMO ! |  |
| 6 | In parallel to this progress, I'd also done some poorer
hoplites (and even quicker). These were sprayed with Humbrol Desert sand
as an undercoat, then a wash of Windsor & Newton Peat Brown is added
to the figures to create a leather armor effect. The arms are added,
then the helmets are blacked and bronzed, and they have caught up
!
If you look carefully you can see the abortive attempt to solder the spears onto the hoplites hands. Which melted the spears, and the hands - sop I gave up pretty quickly. I have done this successfully before, but with using metal rods for the spears - it's still a bit messy, but can be tidied up. Essex spears just melt, so just use superglue. Sad... |
 |
| 7 | Now I added the straps, in a light brown colour - you can
see it best on the hoplites on the right of the picture. Adding the
straps now means that you can put them over any armored cuirasses, but
by painting it straight onto those that will be white-linen the strap
also gets the benefit of the ink wash. It also means that you don't need
to be quite so neat. Some hoplites get the full armor coloured in brown
treatment, for a leather armor effect.
It was a this point I started to realize just how good the Chariot hoplites were - cast-on spears, huge deep details, and the same size as the Essex boys, who actually started to look a bit old in comparison. |
 |
| 8 | Then the famous wash. This was a pretty comprehensive
covering of the white bits with the diluted brown/yellow ink wash from
my other painting guide (here's one I made earlier...). This covered all
the hoplites to create some sort of linen armor effect, and enhanced the
straps as well.
Even though it still looks a bit rough at the moment, bear with me - adding colours for the clothing and a bit more general finishing will work wonders I promise! |
 |
| 9 | Then I did the tunics - a combination of colours, some fairly bright, a lesser number of tans and linens. Again, like the helmets, the real colours should be less exuberant, but there is little enough opportunity for colour here, and as long as it's kept under reasonable control I didn't think it's get too out of place... |  |
| 10 | Next , the greaves | click here to get to the next page |


